Atlux gives you a complete 3D scanning workflow inside Unreal Engine —
from camera volume placement and point cloud generation to automated rendering and Colmap export,
ready to drop into Postshot, LichtFeld Studio, or any compatible Gaussian Splatting pipeline.
Works with any scene type: products and assets, architectural interiors, exterior environments, and large-scale visualizations.

The interactive splat below was generated in Postshot from an Unreal Engine scene
captured entirely with the Atlux workflow — Camera Volume, Point Cloud, and Colmap export.
Drag to orbit, scroll to zoom.
Scroll further down to walk through each step of the pipeline.
More splat examples at the end.
Four steps inside Unreal Engine, then hand off to your Gaussian Splat software of choice.
The Camera Volume is a parametric actor that simulates a real-life 3D scanning booth — an array of virtual DSLR cameras arranged around your subject, ready to capture it from every angle.
A built-in Target defines the focal point — move it and every camera automatically reorients to keep it centred.
Four distribution modes let you match the geometry of any capture scenario:
• Fibonacci — evenly spaced across a sphere (recommended).
• Latitude — 360° rings at multiple heights.
• Halton — random-looking but well-distributed volume fill.
• Grid — uniform cubic distribution.
Camera count and DSLR settings are all adjustable from the Details panel.
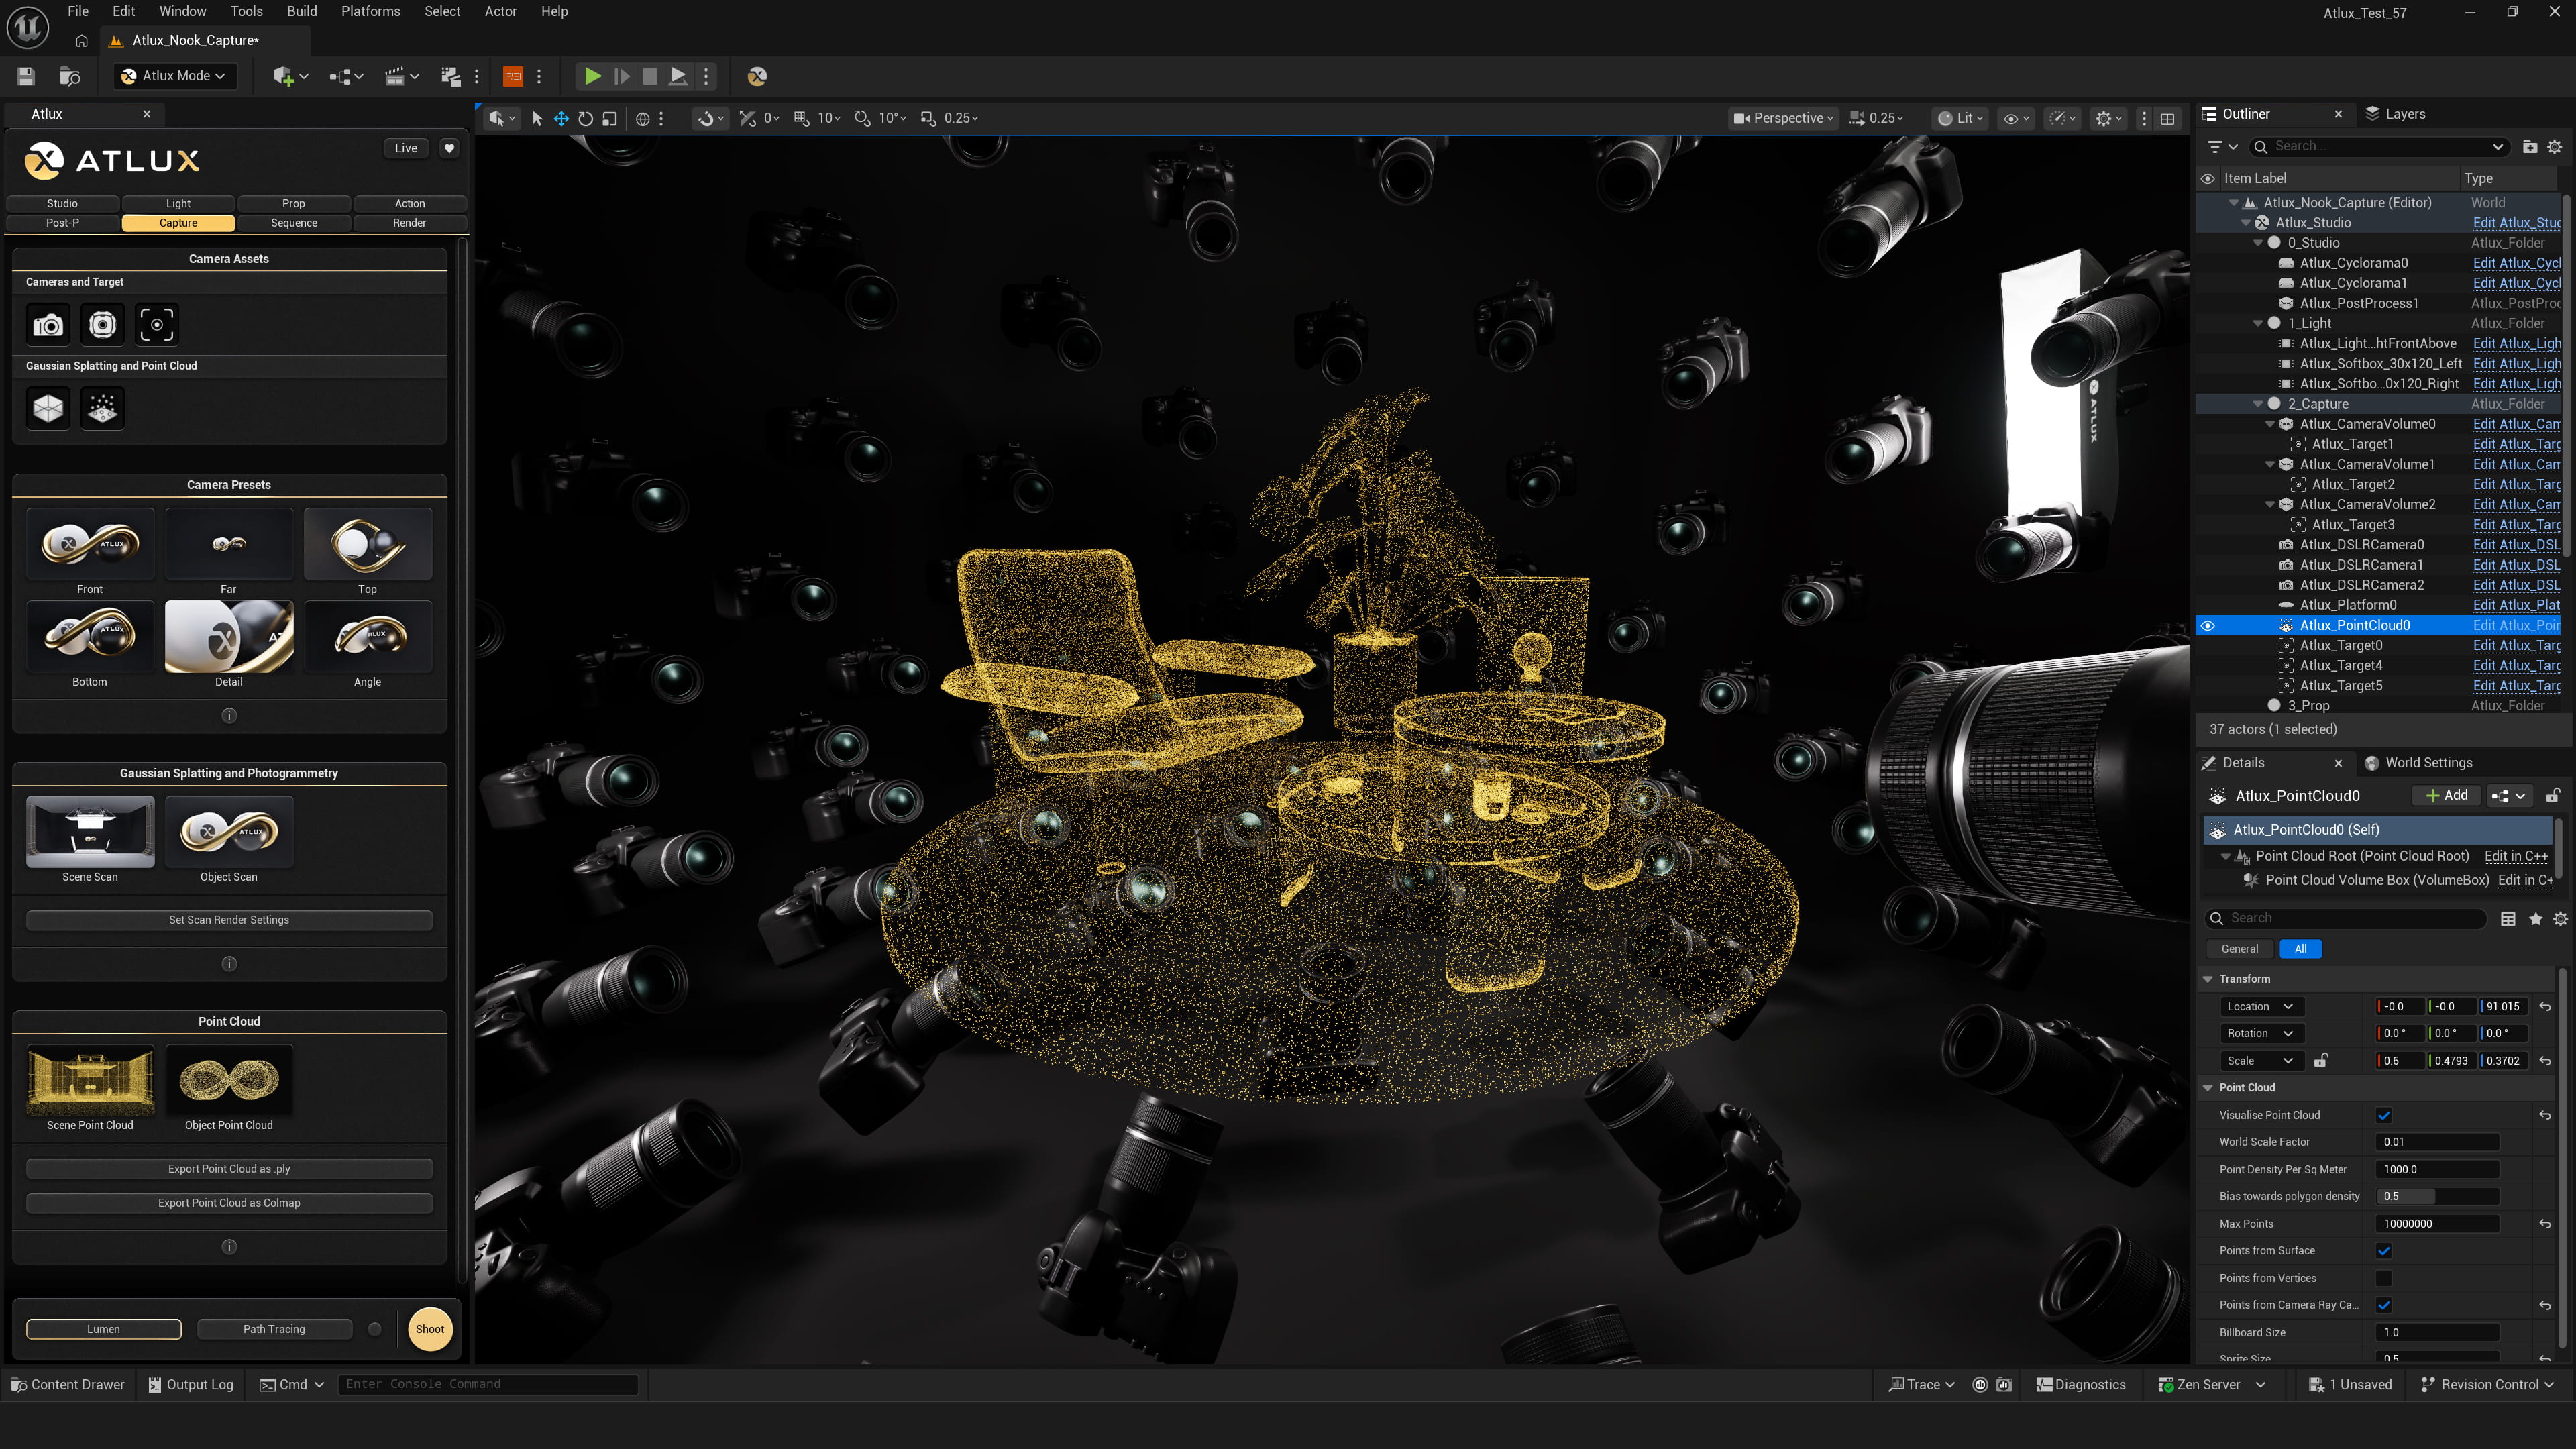
A Point Outwards mode flips the orientation of all cameras, turning the volume into a high-resolution 360° capture rig, ideal to scan interior scenes and rooms.
You can place multiple Camera Volumes in the same scene — each with its own settings — to cover different areas at different densities or capture specific details in the scene.
The 3D Scan presets spawn a ready-configured Camera Volume and Point Cloud by default, so you can start capturing in seconds.
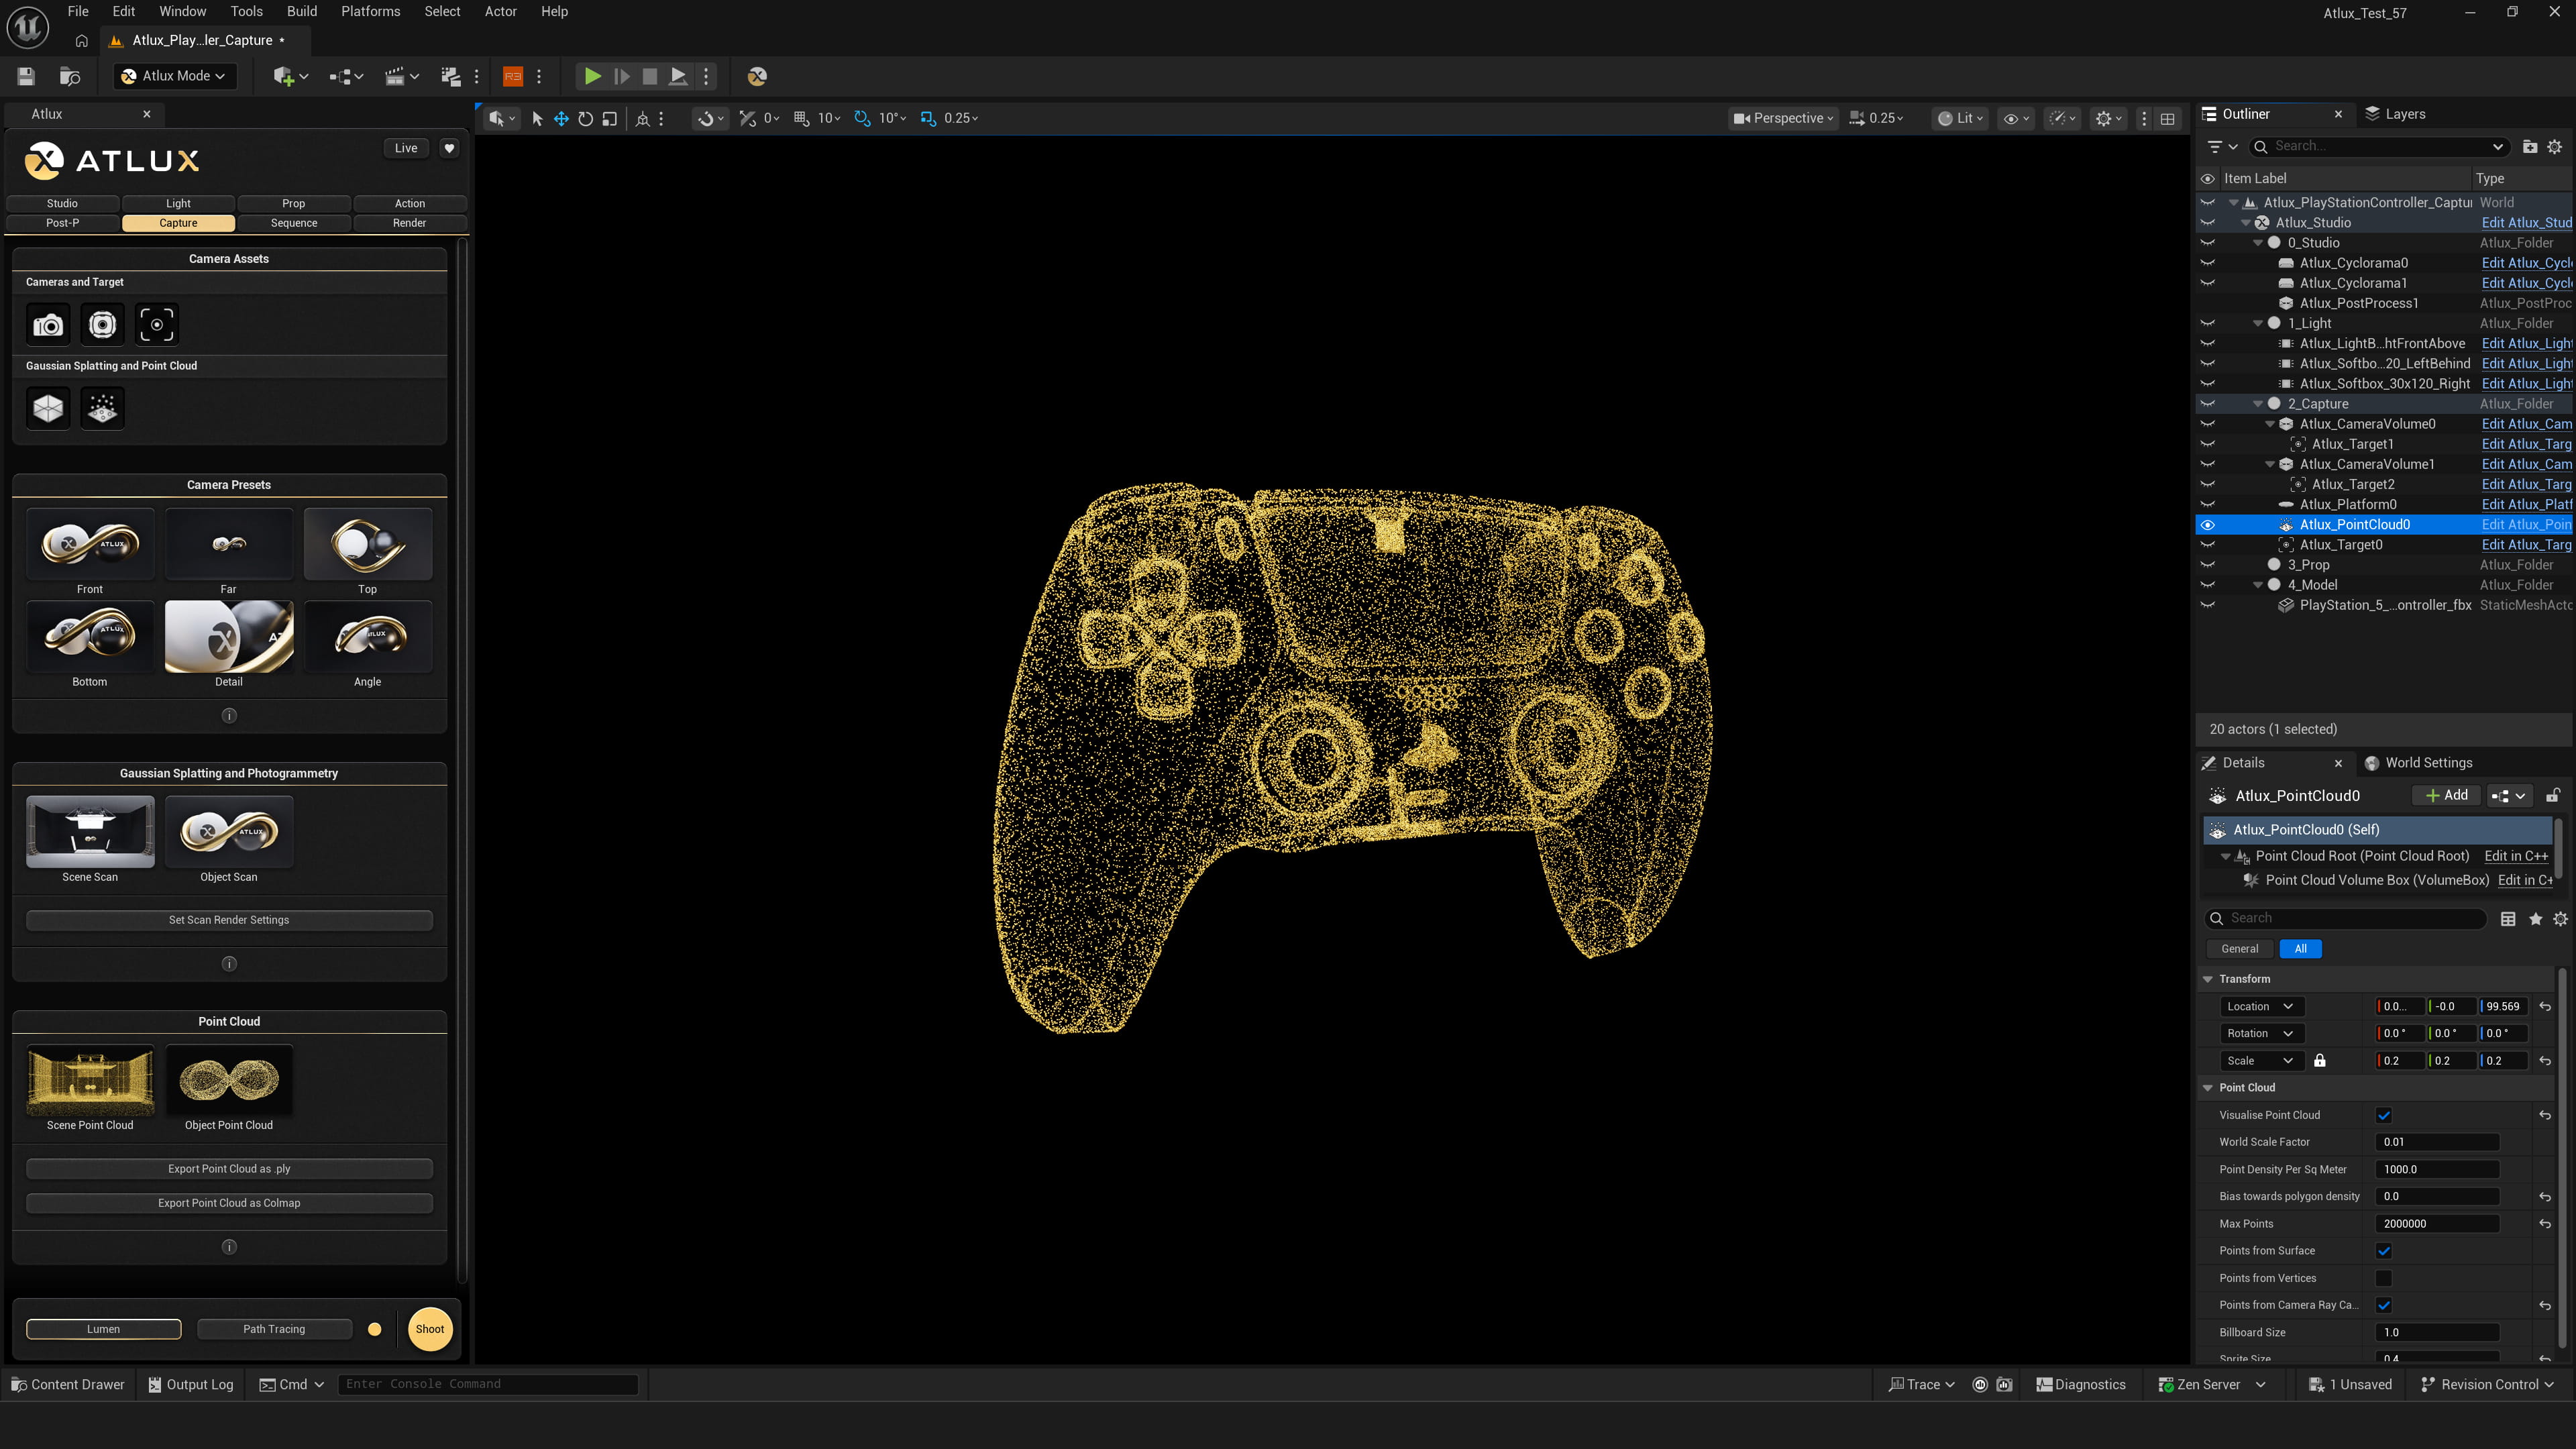
The Point Cloud Volume samples spatial data points directly from the meshes inside it, providing the Gaussian Splat solver with a scene-aware initialisation that dramatically speeds up training.
Three extraction methods can be combined freely:
• From Surface spreads points evenly across mesh surfaces — ideal for detailed 3D models.
• From Camera Ray Casting traces rays from every camera in the volume and places points at the hit locations, making it the most reliable method and one that should almost always be enabled.
• From Vertices places a point at every mesh vertex — useful in specific cases but generally not recommended.
The Bias towards polygon density option controls how the From Surface method distributes points: at 0, distribution is perfectly even; at 1, denser geometry receives more points.
Visualise Point Cloud lets you preview the result directly in the viewport — just make sure to uncheck it before rendering, or the points will appear in your images.
The point cloud can be exported as a .ply file from the Capture menu. It is also written automatically as a points3D.txt inside the Colmap data when batch rendering completes.
Like the Camera Volume, the 3D Scan presets include a ready-configured Point Cloud by default.
Hit Set Scan Render Settings and Atlux configures everything automatically — one click is all it takes before rendering.
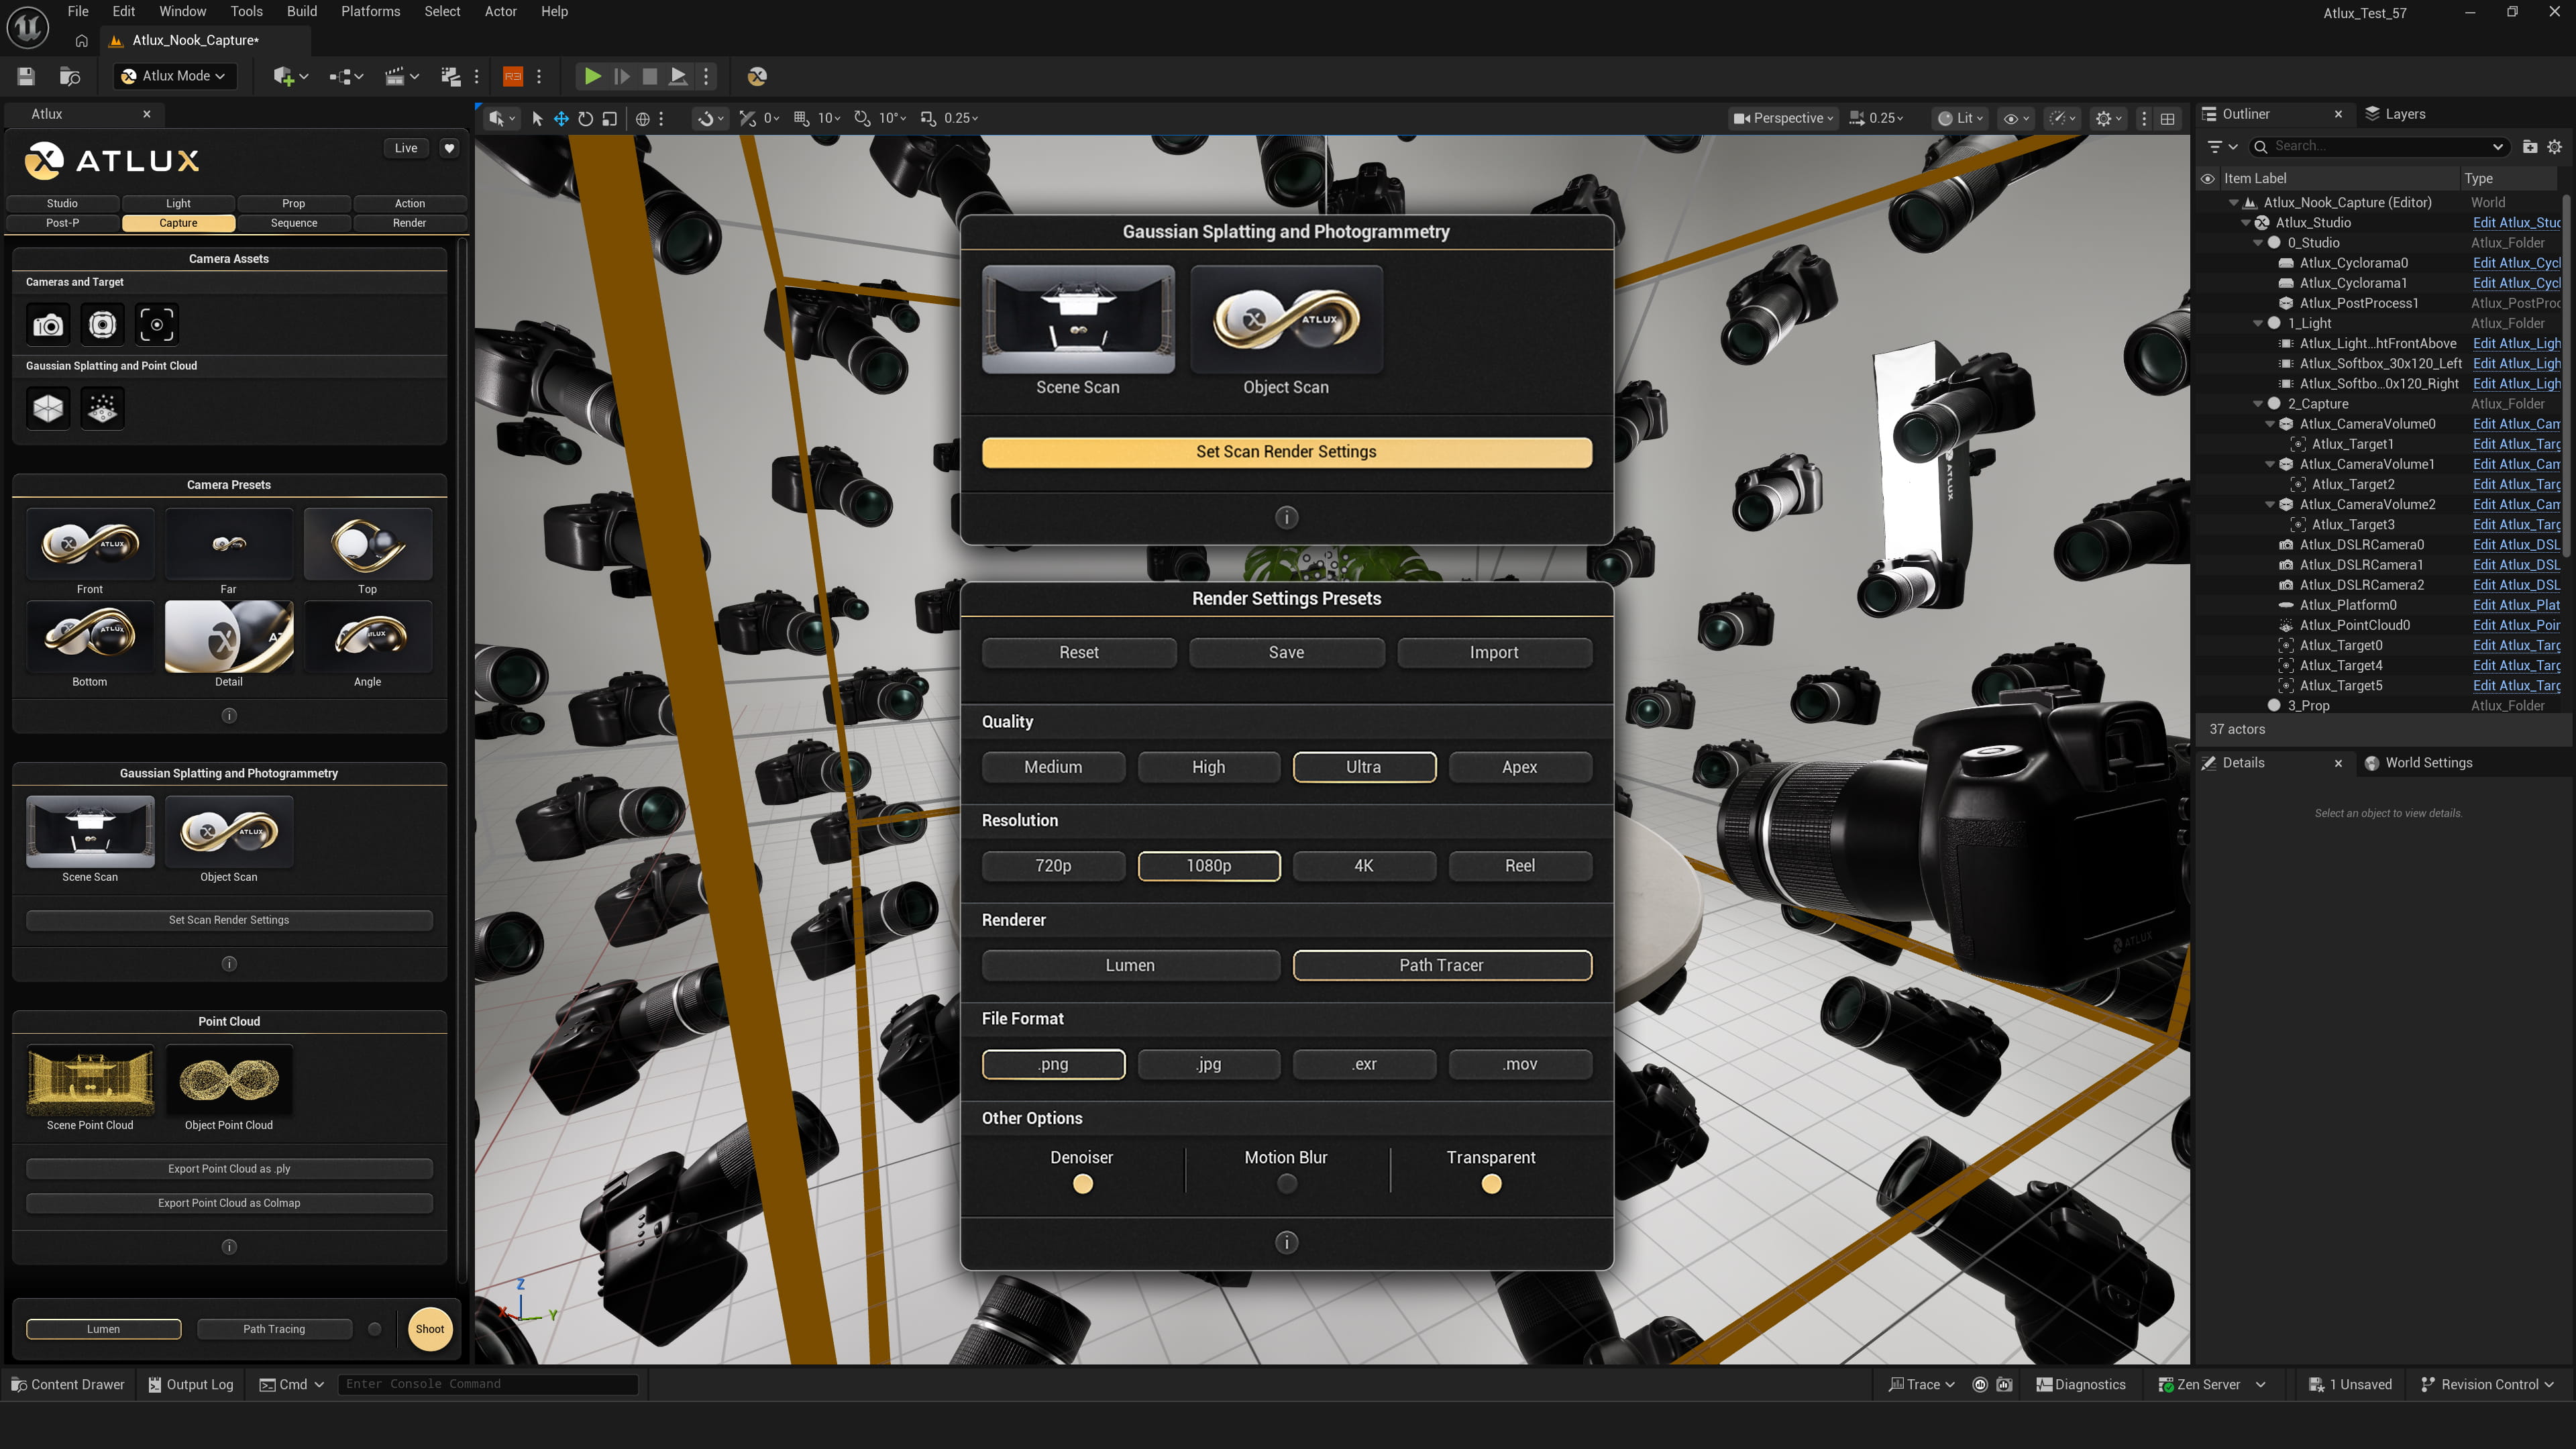
The Set Scan Render Settings button applies the correct configuration in one click:
• Colmap data export is enabled so camera metadata is written automatically at the end of the render.
• Denoiser is applied (essential when using Path Tracing, since noisy frames degrade the Gaussian Splat result);
• File Naming is set to the required convention;
• PNG is selected as the output format.
From there, you can choose your quality and resolution in the Render tab. For a quick test, Medium at 720p is fast and sufficient. For a final result, Ultra at 1080p is a reliable choice. The renderer — Lumen or Path Tracing (recommended) — can be selected as well.
Enabling Transparent Background masks the subject from the background, producing a cleaner Gaussian Splat with no environment bleed. Place the actors you want to isolate inside the 4_Model folder in the Outliner, in the Atlux Studio actor. Static Meshes must be set to Movable for this.
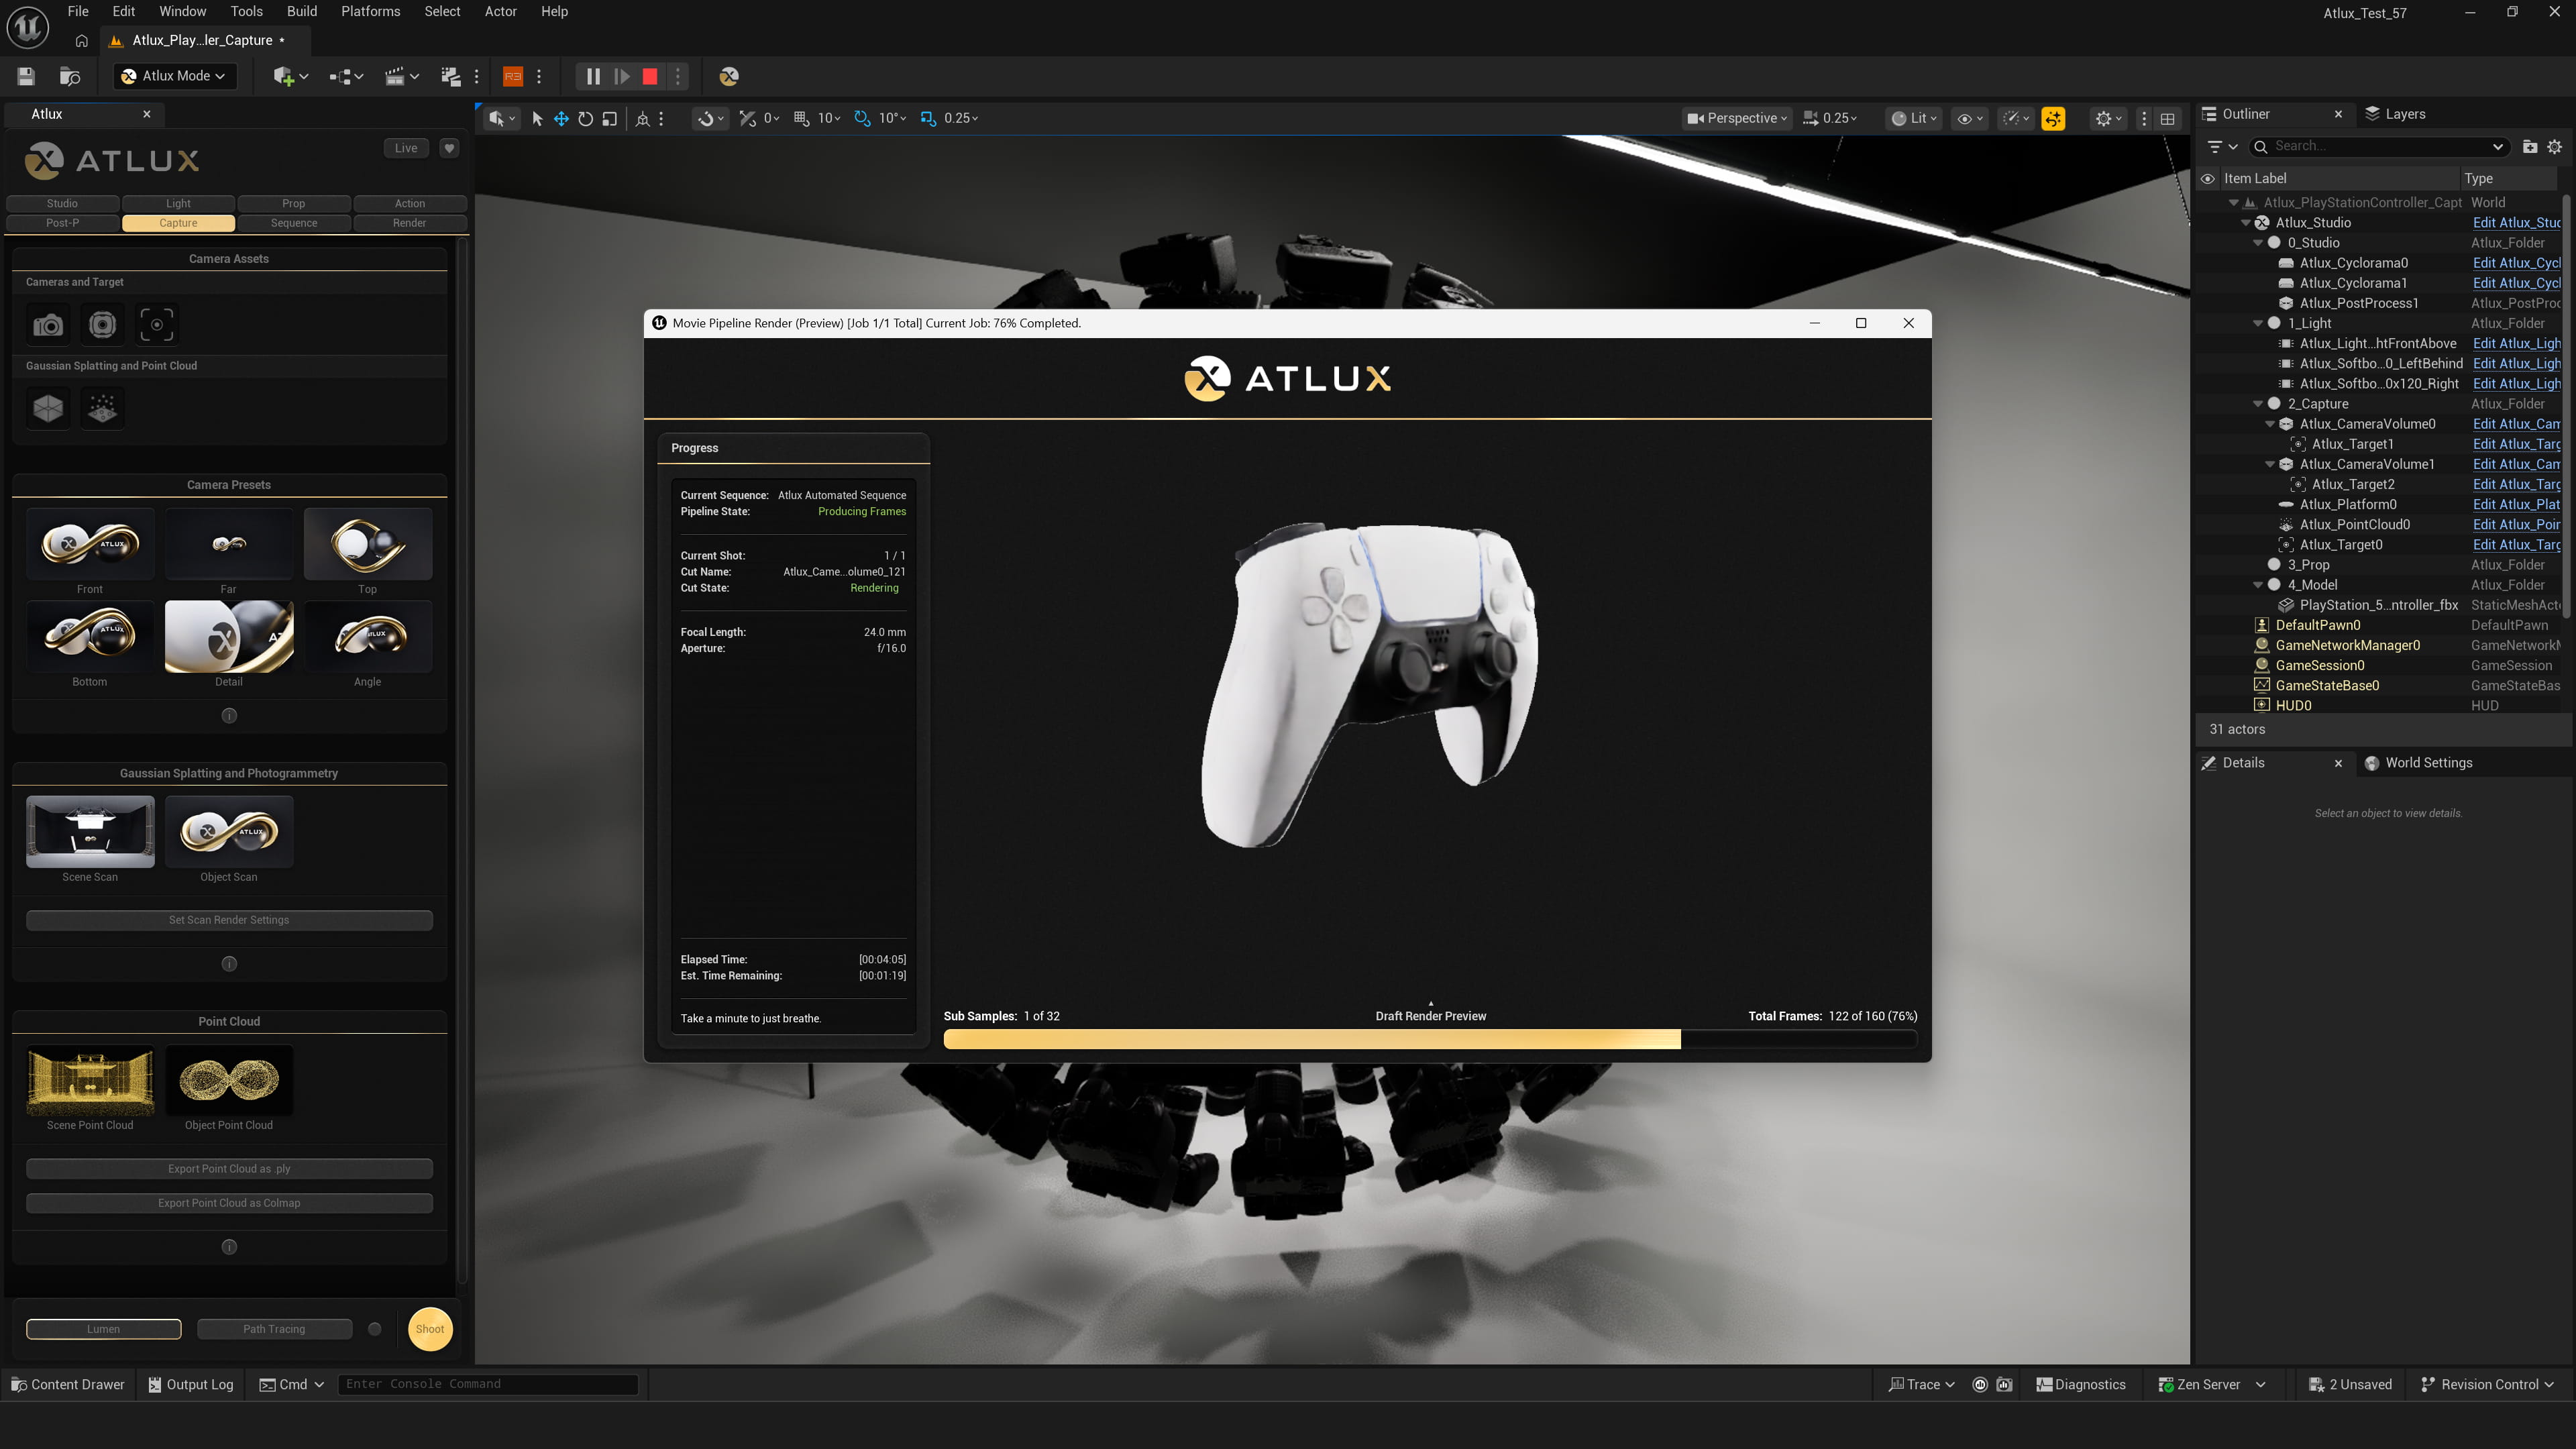
Press Shoot and Atlux takes it from there — every camera in the scene, rendered in sequence without any further input.
Atlux queues every camera in the scene, including all Camera Volumes, and renders them in sequence — no manual sequencer setup, no Movie Render Queue, no per-camera configuration.
The output images are named and organised automatically in the structure Colmap expects.
When the last frame completes, Unreal Engine will pause briefly while Atlux writes the Colmap data and assembles the final Scan folder. Once that finishes, the dataset is ready to hand off.
The Scan folder Atlux produces is a complete, ready-to-train dataset. Drag it into your Gaussian Splat software of choice and let it run.
Once Atlux finishes the batch render, a Scan folder appears in your render output directory, containing all rendered frames and the full Colmap dataset.
If Transparent Background was enabled, or any other render pass, an individual folder for each pass will be created inside the Scan folder.
Drag the Scan or the individual Colmap folder directly into
Postshot
or
LichtFeld Studio
to start training — no manual Colmap setup required, as all camera poses and intrinsics are already embedded.
Training time ranges from a few minutes to a couple of hours depending on scene complexity and your GPU. More complex scenes also increase processing time.
Once complete, export the .splat or .ply file, and you can upload it to
SuperSplat
to share it interactively — embeddable on any website or accessible via a public link.
All generated using the Atlux workflow, and all created in a laptop — quality can be greatly improved on a dedicated machine.
Click any thumbnail to load it in the viewer.
Drag to orbit, scroll to zoom.
The Atlux workflow is not limited to isolated objects. The Camera Volume, Point Cloud, and Colmap export work equally well across interior spaces, architectural exteriors, and large open environments — any scene you can build in Unreal Engine can become a Gaussian Splat.
One perpetual license unlocks the full Atlux toolkit — including the complete Gaussian Splatting pipeline, on top of its Virtual Photo Studio, light assets and presets, and much more.